Warning: Declaration of Bootstrap_Walker::start_lvl(&$output, $depth) should be compatible with Walker_Nav_Menu::start_lvl(&$output, $depth = 0, $args = NULL) in /home/itport/public_html/wp-content/themes/itport-v5.0/functions/bootstrap-walker.php on line 25

Warning: Declaration of Bootstrap_Walker::end_lvl(&$output, $depth) should be compatible with Walker_Nav_Menu::end_lvl(&$output, $depth = 0, $args = NULL) in /home/itport/public_html/wp-content/themes/itport-v5.0/functions/bootstrap-walker.php on line 42

Warning: Declaration of Bootstrap_Walker::start_el(&$output, $item, $depth, $args) should be compatible with Walker_Nav_Menu::start_el(&$output, $data_object, $depth = 0, $args = NULL, $current_object_id = 0) in /home/itport/public_html/wp-content/themes/itport-v5.0/functions/bootstrap-walker.php on line 57

Warning: Declaration of Bootstrap_Walker::end_el(&$output, $item, $depth, $args) should be compatible with Walker_Nav_Menu::end_el(&$output, $data_object, $depth = 0, $args = NULL) in /home/itport/public_html/wp-content/themes/itport-v5.0/functions/bootstrap-walker.php on line 108
آی تی پورت | شبکه کردن
Warning: Use of undefined constant url - assumed 'url' (this will throw an Error in a future version of PHP) in /home/itport/public_html/wp-content/themes/itport-v5.0/header.php on line 56

Warning: Use of undefined constant title - assumed 'title' (this will throw an Error in a future version of PHP) in /home/itport/public_html/wp-content/themes/itport-v5.0/header.php on line 57
اتوماسیون اداریشبکه

به راحتی کامپیوتر های خود را شبکه کنید!

مجله اینترنتی آی تی پورت

در این آموزش قصد داریم شما رو با شبکه کردن چند  کامپیوتر  آشنا کنیم  ابتدا قبل از اینکه به سراغ آموزش بریم لطفا از نصب بودن درایو سخت افزاری برروی سیستم ها و  همچنین سالم بودن آن اطمینان خاطر داشته باشید.

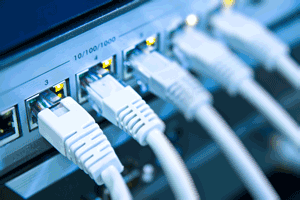
ابتدا به کابل معمولی شبکه یا cross نیاز داریم. البته جهت شبکه کردن چندین سیستم نیاز به یک switch هم داریم.

پس از اتصال کابل از switch به سیستم ها(Client) و سیستم اصلی(server)، به ترتیب وارد.

Start> Control Panel > Network and Sharing center و بعد کلیک بر روی Local Area Connection در پنجره باز شده برروی properties و در کادر میانی Internet Protocol ver4 را انتخاب و سپس بروی properties کلیک می نمائید.

در کادر باز شده گزینه use the Following Ip address را انتخاب می کنیم تا کادر های ذیل فعال گردد.

مطالعه کامل این مطلب